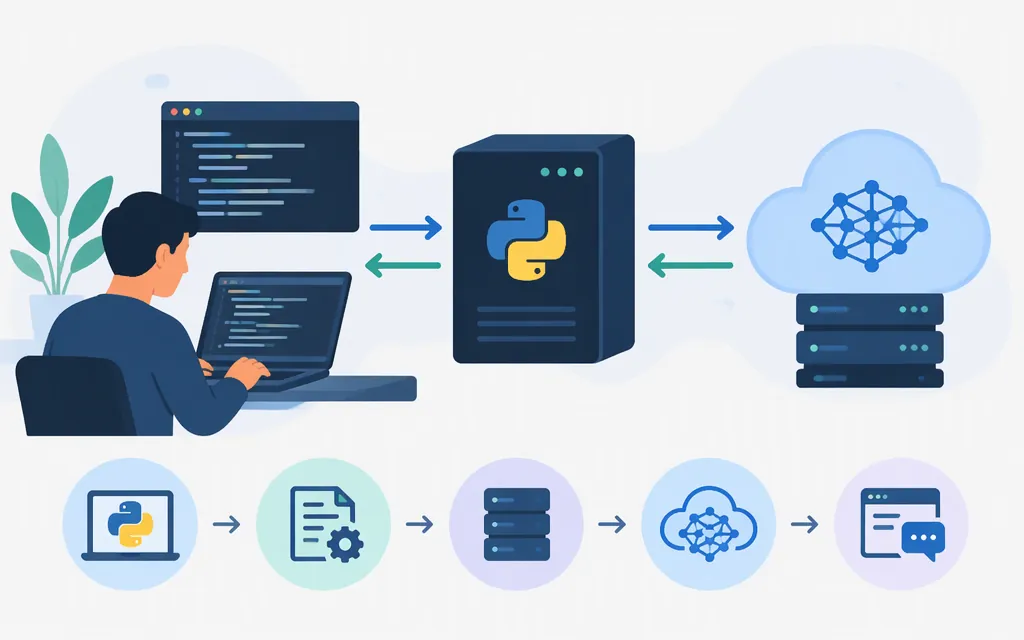
Build a local MCP server by exposing a Python function as a tool, calling a model API from that function, and testing the tool with an MCP client. This tutorial uses FastMCP 4.x, stdio transport, and OpenAI’s Responses API. The client starts the server locally; this tutorial does not deploy a remotely hosted server. FastMCP documents local Python-file clients, tool discovery, and Python return values through its client API. (gofastmcp.com)
The MCP server is the bridge: an MCP client calls its tool, the tool calls the model API, and the server returns the model’s text. You need one tool to build this example; resources and prompts are optional.
Provider note: This example calls OpenAI’s API. Token Forge Cloud’s public product description does not establish the endpoint, authentication, or request schema needed for a verified Token Forge integration. This code is not a Token Forge Cloud integration; don’t substitute an endpoint or model name by guesswork.
What you’ll build
A local Python server with an ask_model tool. The tool accepts a question, sends it to the OpenAI Responses API, and returns the generated text. A small FastMCP client script will list the tool, call it, and check the returned text.
Use Python 3.10 or later. FastMCP’s current stable major release is 4, and its package metadata specifies Python 3.10 or later; the OpenAI Python library also supports Python 3.10 or later. You’ll also need an OpenAI API key and access to the model you select. (github.com)
1. Create a project and install the packages
In a terminal, create a project directory and virtual environment:
mkdir mcp-model-server
cd mcp-model-server
python -m venv .venv
Activate it:
# macOS or Linux
source .venv/bin/activate
# Windows PowerShell
.venv\Scripts\Activate.ps1
Install FastMCP 4.x and the OpenAI Python library:
python -m pip install "fastmcp>=4,<5" openai
This major-version range scopes the example to FastMCP 4.x; it does not pin exact package releases or claim that a particular combination was tested. For a team project, record and test the resolved versions in your lockfile. FastMCP’s installation guide documents package installation, and its documentation identifies version 4 as stable. (gofastmcp.com)
2. Set the API key outside your source code
Set the key in the terminal you’ll use to start the server or run the test. Don’t put it in the Python file or commit it to source control.
# macOS or Linux
export OPENAI_API_KEY='your-api-key'
# Windows PowerShell
$env:OPENAI_API_KEY = 'your-api-key'
The OpenAI Python SDK reads OPENAI_API_KEY when you create OpenAI() without passing an explicit key. It sends requests to the SDK’s default OpenAI API base URL, https://api.openai.com/v1, unless you configure a different base URL. This tutorial uses the default destination and does not configure a custom endpoint. (github.com)
3. Write the MCP server
Create server.py:
import logging
import os

from fastmcp import FastMCP
from openai import OpenAI, OpenAIError

logging.basicConfig(level=logging.INFO)
logger = logging.getLogger(__name__)

if not os.environ.get("OPENAI_API_KEY"):
    raise RuntimeError("Set OPENAI_API_KEY before starting this server.")

client = OpenAI()
mcp = FastMCP("Model API MCP Server")


@mcp.tool
def ask_model(question: str) -> str:
    """Send a question to the configured model and return its text response."""
    question = question.strip()
    if not question:
        raise ValueError("question must not be blank")
    if len(question) > 6000:
        raise ValueError("question must be 6000 characters or fewer")

    try:
        response = client.responses.create(
            model="gpt-5.5",
            input=question,
        )
        return response.output_text
    except OpenAIError as exc:
        # Log only the exception class; do not include the message or traceback.
        logger.error("Model API request failed (%s)", type(exc).__name__)
        raise RuntimeError(
            "Model API request failed; check the server configuration and logs."
        ) from None


if __name__ == "__main__":
    mcp.run()
The @mcp.tool decorator exposes the function to MCP clients. FastMCP uses the function signature to create the input schema and the docstring as its description. The OpenAI SDK’s Responses API accepts a model and input, and the response exposes generated text through output_text. The example model identifier follows the SDK’s current Python example; choose a model available to your account. (gofastmcp.com)
The blank and length checks run before the outbound API request. A missing key stops the server at startup. If an OpenAI SDK error occurs, the tool returns a generic failure message; the server logs only the exception class, without the exception message or traceback. This sample does not add remote-user authentication, rate limiting, persistence, or deployment hardening.
4. Check syntax and run the server
Before starting the client test, you can ask Python to check both files for syntax errors:
python -m py_compile server.py test_client.py
This is a check for you to run; it is not a claim that the files were executed during research.
To start the server directly, use FastMCP’s CLI:
fastmcp run server.py
FastMCP uses stdio by default when running a server this way. In the client test below, Client("server.py") launches and manages the local server process, so you do not need to run the CLI in a separate terminal for that test. (gofastmcp.com)
5. Test successful and rejected calls with an MCP client
Create test_client.py in the same directory:
import asyncio

from fastmcp import Client


async def main():
    async with Client("server.py") as client:
        tools = await client.list_tools()
        tool_names = [tool.name for tool in tools]
        print("Available tools:", tool_names)
        assert "ask_model" in tool_names

        result = await client.call_tool(
            "ask_model",
            {"question": "In one sentence, what does an MCP server do?"},
        )
        answer = result.data
        assert isinstance(answer, str) and answer.strip()
        print("Model response:", answer)

        # Use the raw MCP result to check a tool error without raising it
        # as a client exception.
        rejected = await client.call_tool_mcp(
            "ask_model",
            {"question": "   "},
        )
        assert rejected.isError, "Expected the blank question to be rejected"
        print("Blank-question call rejected as expected.")


asyncio.run(main())
Run the test from the project directory, with OPENAI_API_KEY still set:
python -m py_compile server.py test_client.py
python test_client.py
list_tools() returns a list of tool objects. The regular call_tool() returns a FastMCP result whose .data property holds the Python return value. For the failure check, call_tool_mcp() returns the raw MCP tool result, which includes an isError flag; the assertion checks that the blank question is rejected. (gofastmcp.com)
Expected behavior: the tool list contains ask_model; the successful call returns non-empty model text; and the blank-question call is flagged as an error. The exact model wording varies. These are expected behaviors for the example, not results claimed from an execution here.
If something fails
- Missing-key error: set
OPENAI_API_KEYin the terminal running the test, then retry. - Authentication or model-access error: check that the key is valid and the selected model is available to your account. The server reports a generic tool error and logs the exception class only.
- Tool not listed: check that
server.pyis in the project directory, the virtual environment is active, and the server imports successfully. - Blank question not rejected: confirm that the complete
server.pyhas the blank-input check shown above and that the test callscall_tool_mcp()for the error assertion.
Local server versus remote service
This example is a local stdio server: the MCP client starts it on the same machine. Hosting an MCP server at a network URL is a separate setup involving a remote transport, deployment, and access-control decisions. FastMCP supports HTTP transports, but this tutorial does not configure or deploy one. (gofastmcp.com)
Adapting the tool to another model API
Keep the MCP tool and client flow, but replace the outbound API call only after consulting that provider’s current developer documentation. Verify its base URL, model identifier, authentication, request fields, response format, and error behavior. The available Token Forge Cloud product description is not enough to infer those integration details, so this tutorial does not provide Token Forge-specific code.