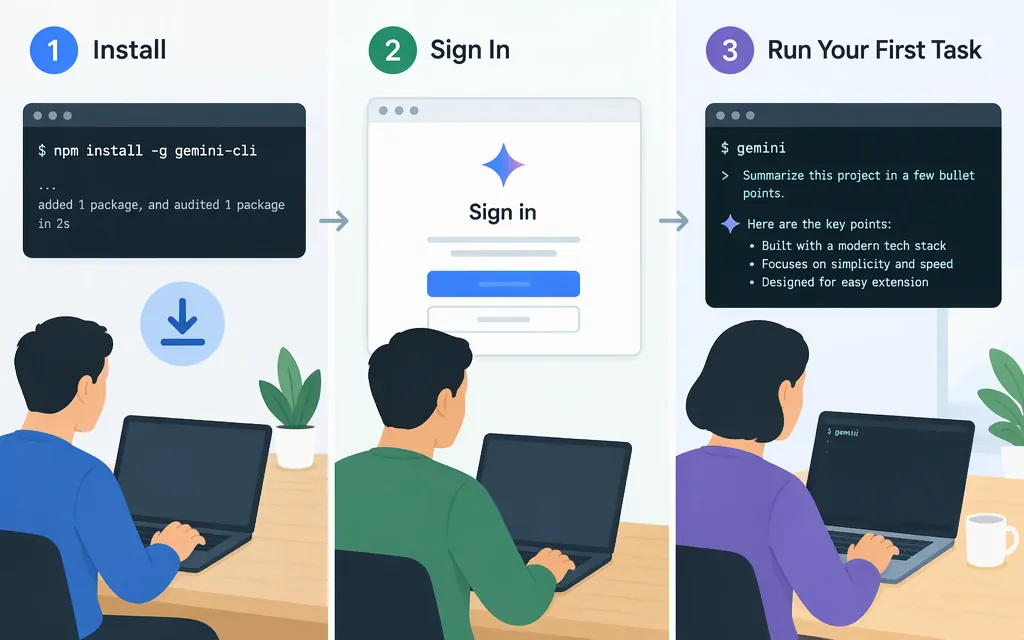
To use Gemini CLI: install it with npm, start it with gemini, authenticate, then give it a prompt from the project directory you want it to work with. Start with a read-only question so you can evaluate its understanding before asking it to change files.
Gemini CLI is an interactive terminal tool. A program using the Gemini API is different: your application sends requests to a model and handles the responses. Gemini CLI supports Google sign-in and Gemini API-key authentication; the authentication choice for a CLI session is separate from making API requests in your application. (geminicli.com)
1. Check the prerequisites
The installation guide lists Node.js 20.0.0 or later, Bash, Zsh, or PowerShell, an internet connection, and a location where Gemini Code Assist is supported. It gives recommended system specifications of macOS 15+, Windows 11 24H2+, or Ubuntu 20.04+. These are recommended specifications, not a statement that older systems are minimum-incompatible. Check the current guide for your system and location before installing.
Check your Node.js version in a terminal:
node --version
If Node.js is missing or below version 20, install or update it before continuing.
2. Install and start Gemini CLI
For a regular installation, run:
npm install -g @google/gemini-cli
Then start the CLI:
gemini
To try it without a global installation, use:
npx @google/gemini-cli
The official installation guide documents both options. Global installation makes the gemini command available for repeated use; npx lets you run the package without a permanent global install.
To check the installed version, run gemini --version. If gemini is not found after installation, check that npm’s global executable directory is on your shell’s PATH.
3. Authenticate
For most users, the documented sign-in route is a personal Google account:
- Start Gemini CLI with
gemini. - Choose Sign in with Google when prompted.
- Complete the browser sign-in and return to the terminal.
The CLI caches credentials for future sessions. Most individual Google accounts do not need a Google Cloud project for authentication. A project is required for organization accounts and may also be required for some Gemini Code Assist licenses. If you use a company, school, or Google Workspace account, follow the project setup requirements in the authentication guide. (geminicli.com)
You can also authenticate the CLI with a Gemini API key from Google AI Studio. The official guide documents creating the key and setting GEMINI_API_KEY. For macOS or Linux:
export GEMINI_API_KEY="YOUR_GEMINI_API_KEY"
gemini
For PowerShell:
$env:GEMINI_API_KEY = "YOUR_GEMINI_API_KEY"
gemini
If the CLI asks you to choose an authentication method, select Gemini API Key. The documentation does not state that this selection prompt is required every time the variable is set. If you already have a Google-authenticated session and want to change methods, run /auth inside Gemini CLI; it opens a dialog for changing the authentication method. Keep your key private. (geminicli.com)
4. Give Gemini a first task
Start the CLI in the project directory you want it to inspect. Begin with a read-only prompt, for example:
Explain the purpose of this project. Identify the main entry point and summarize the relevant files. Do not edit files or run commands that change the project.
For a focused question about a specific file, use @ followed by its path:
@src/app.ts Explain how this file handles incoming requests. Do not make changes.
Replace src/app.ts with a path in your project. Gemini CLI’s file-management guide documents using @path/to/file to include a file’s contents in the prompt.
Expected outcome: Gemini responds with an explanation based on the project or file context you supplied. If the answer is too broad, ask a specific follow-up, such as: “Which function handles authentication? Name the file and function.” The response depends on your code and prompt, so check its claims against the source.
5. Review proposed changes and commands
When you want an edit, state the file, scope, and limits clearly. For example:
In src/app.ts, add input validation for the email field. Keep the change limited to this file and show me the proposed diff before applying it. Do not run tests or other shell commands without asking.
The tools documentation says that file-modifying actions and shell commands require user approval by default; the CLI shows a diff or the command before you confirm. Read the proposal and approve only actions you understand and want it to take. Otherwise, decline and revise your request.
Be cautious with projects you have not reviewed. Don’t approve a folder, file edit, or command just to get past a prompt. You can ask Gemini to explain a proposed action or request read-only analysis instead.
Gemini CLI vs. a production Gemini API
| Choose | When it fits | What happens |
|---|---|---|
| Gemini CLI | You want interactive help with a local project in your terminal. | You run gemini, authenticate, provide prompts and project context, and review proposed actions. |
| Gemini API | Your application or server needs to send model requests programmatically. | Your software makes authenticated requests and handles the returned data. |
Google’s current text-generation documentation shows a REST generateContent request with an API key, JSON request body, and model identifier. The following is a Bash smoke test for macOS or Linux—not a Gemini CLI prompt. Create a Gemini API key in Google AI Studio, set it in your shell, and use a model available to your project. API keys are associated with Google Cloud projects; access, billing, and limits depend on the applicable project and model. (ai.google.dev)
export GEMINI_API_KEY="YOUR_GEMINI_API_KEY"

curl "https://generativelanguage.googleapis.com/v1beta/models/gemini-3.8-flash:generateContent" \
  -H "x-goog-api-key: $GEMINI_API_KEY" \
  -H "Content-Type: application/json" \
  -X POST \
  -d '{"contents":[{"parts":[{"text":"Explain what a health-check endpoint does in one sentence."}]}]}'
The response is JSON. In the documented response shape, generated text is in candidates[0].content.parts[0].text. Confirm the model is available to your project before using it. For a production application, keep credentials on a trusted server—not in browser or mobile client code—and follow Google’s current key-security, access, billing, and operational guidance. (ai.google.dev)
In short: use Gemini CLI for interactive terminal work; use the Gemini API when your software needs programmatic model requests. An API key can be used with the CLI or API, but a CLI session is not itself an application integration.
Troubleshooting common setup problems
geminiis not found: Confirm the install completed and check that npm’s global executable directory is on yourPATH. You can also trynpx @google/gemini-cli.- A work or school account cannot authenticate: Organization accounts may require a Google Cloud project. Check the CLI authentication guide or ask your administrator for the required setup. (
geminicli.com) - You’re unsure about a proposed action: Decline it, ask Gemini to explain the diff or command, or request a read-only analysis instead. Review actions before approving them.
For version-specific setup details, consult the official Gemini CLI installation and authentication documentation.
Sources
Gemini CLI installation, execution, and releases
Gemini CLI authentication setup
File management with Gemini CLI